STAFF RESOURCES
CHANGING THE PRINTER SETTING TO 2x6 INCH CUT
FAST GUIDE: SETTINGS > PRINTING > CONFIGURE PRINTER > PREFERENCES > ADVANCED > 2inch cut: Enable > OK > OK > PRINT > SAVE
From the DSLR Booth menu at the top right click SETTINGS
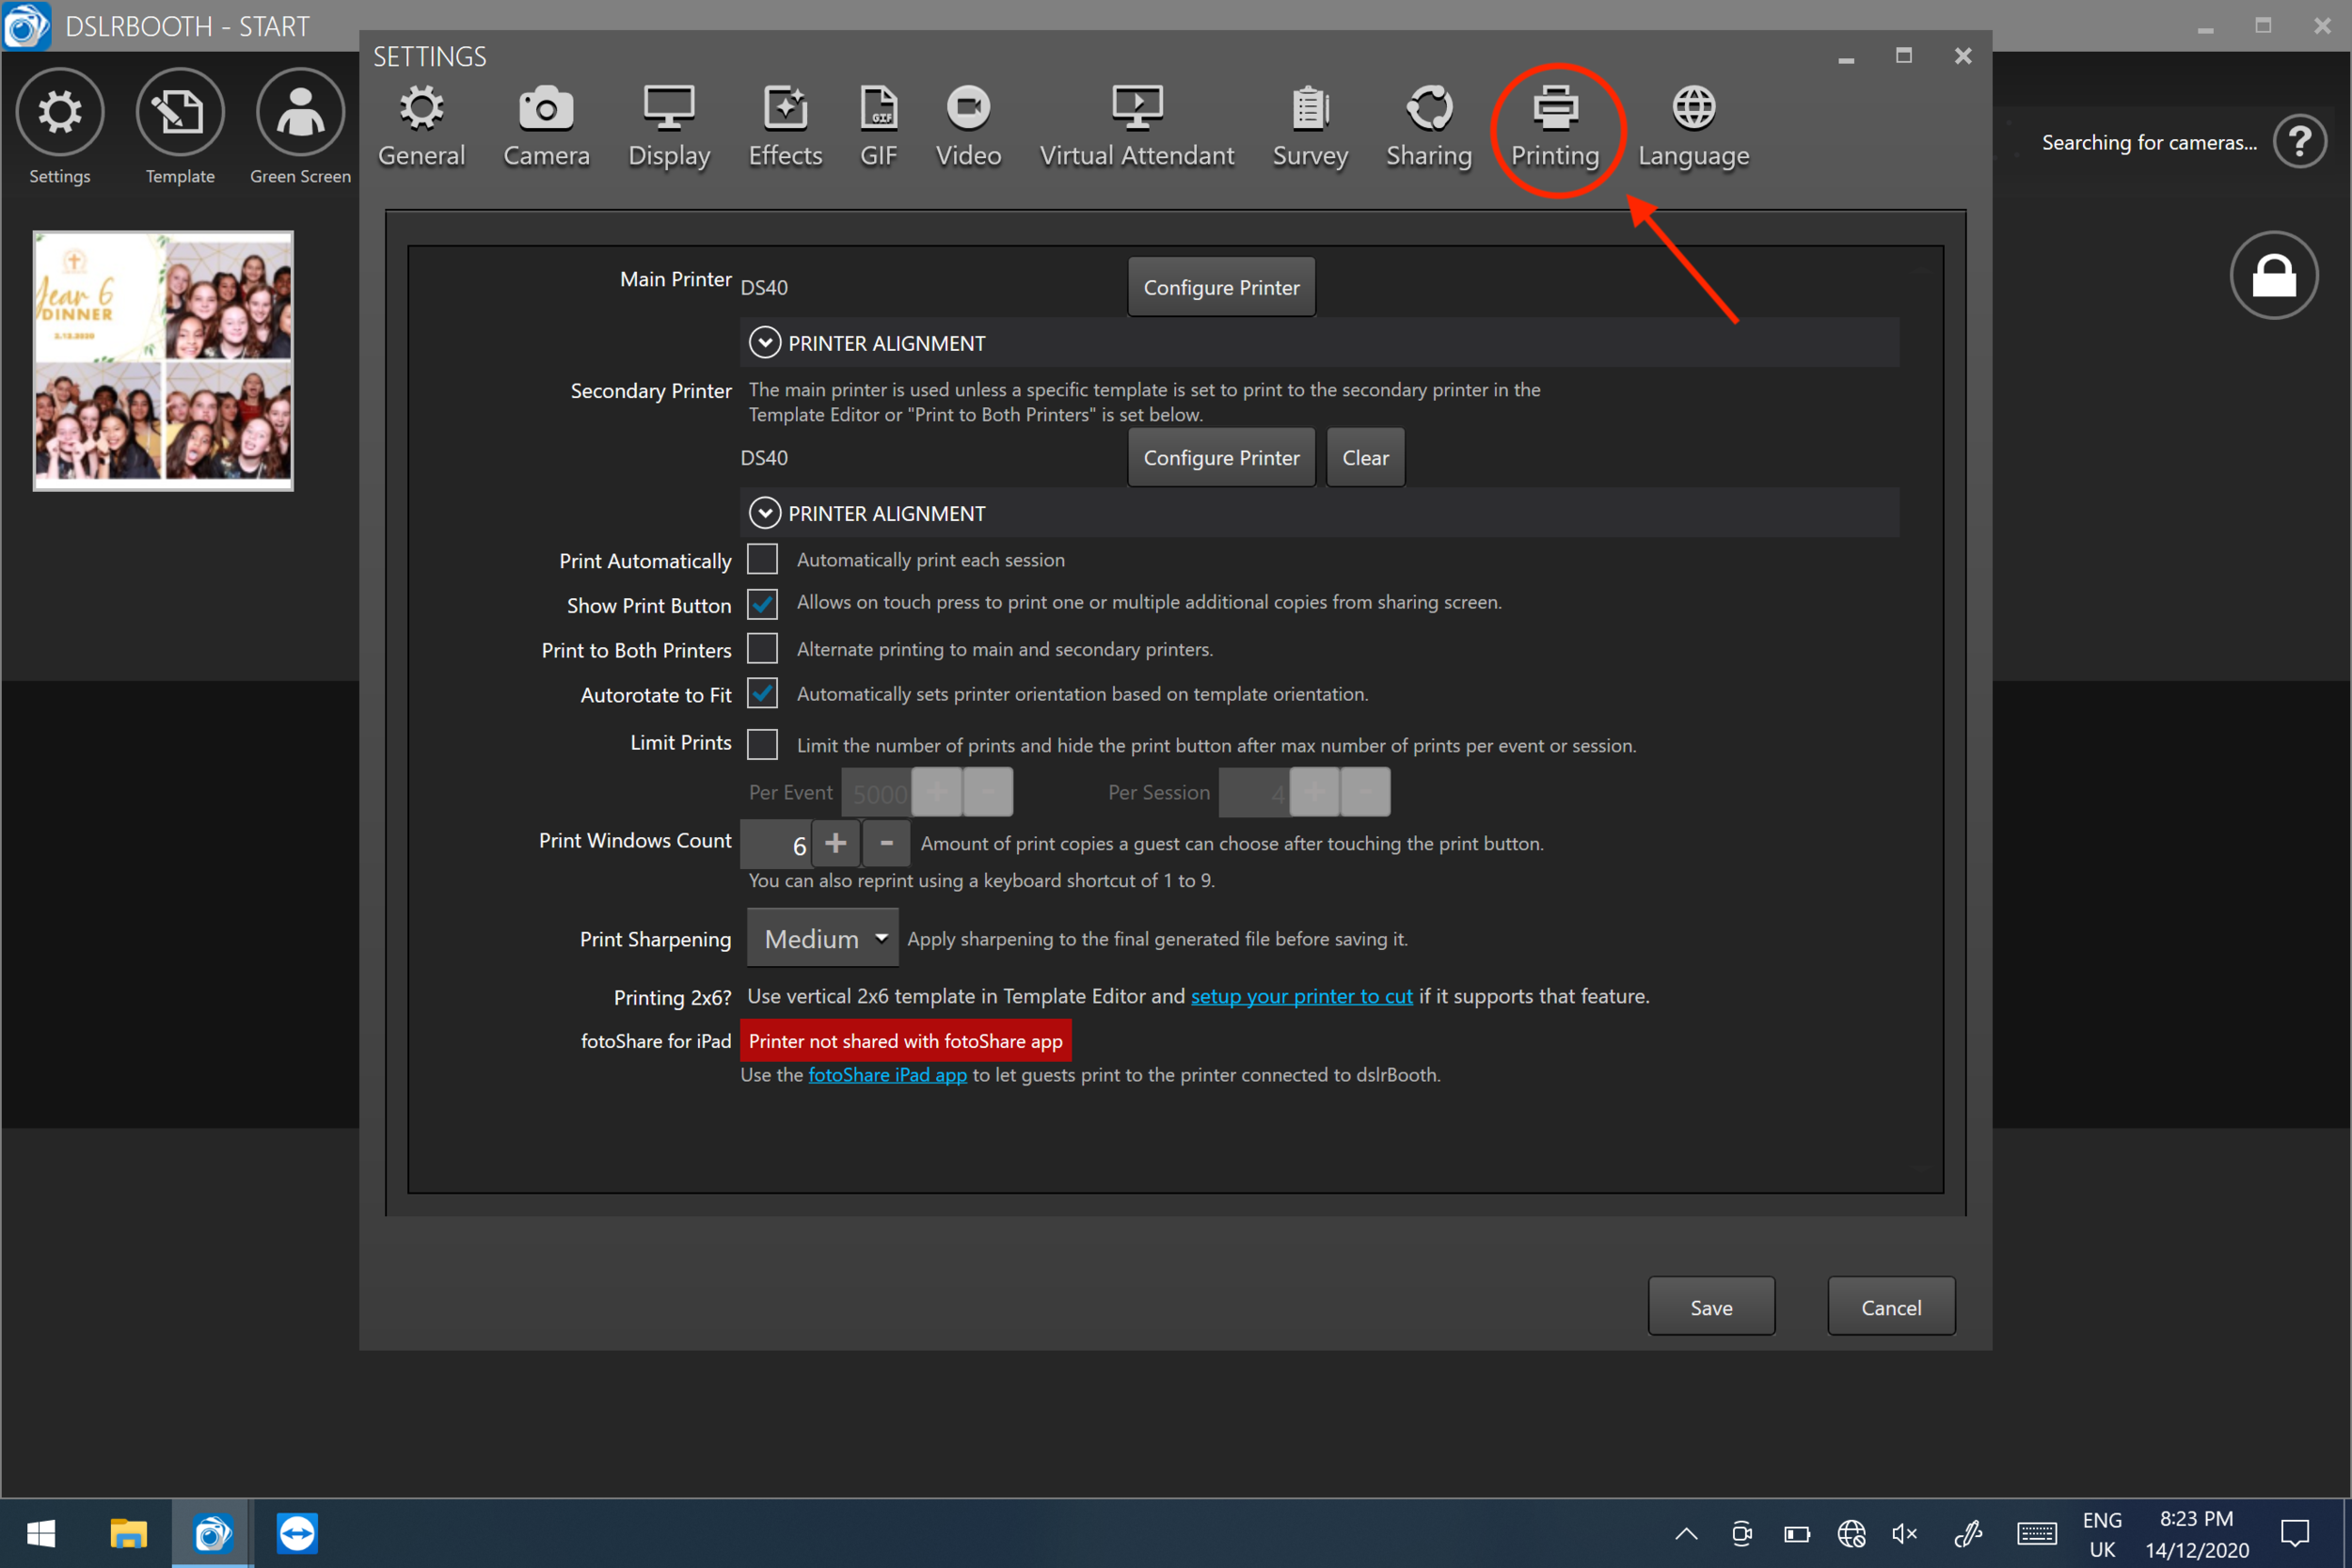
Click PRINTING
Click the CONFIGURE PRINTER button at the very top of the screen
Make sure DS40 is selected and click the PREFERENCES button.
Click the ADVANCED button near the bottom of the window.
Go to the very bottom of the menu where is says ‘2inch cut:’ and select ‘Enable’ from the drop down menu next to ‘2inch cut:
Click OK
Click OK
Click PRINT
Click SAVE


PRINTER - Clearing a Cutter Jam - VIEW PDF
PRINTER - How to Clear the Paper Path - VIEW PDF
PRINTER - Scrap Box Error (Flashing red light on printer) - VIEW PDF
PRINTER - How to Repair a Torn Ribbon - VIEW PDF
PRINTER - How to Troubleshoot Using the Indicator Lights - VIEW PDF
PRINTER - Restarting the Printer Spool - VIEW article